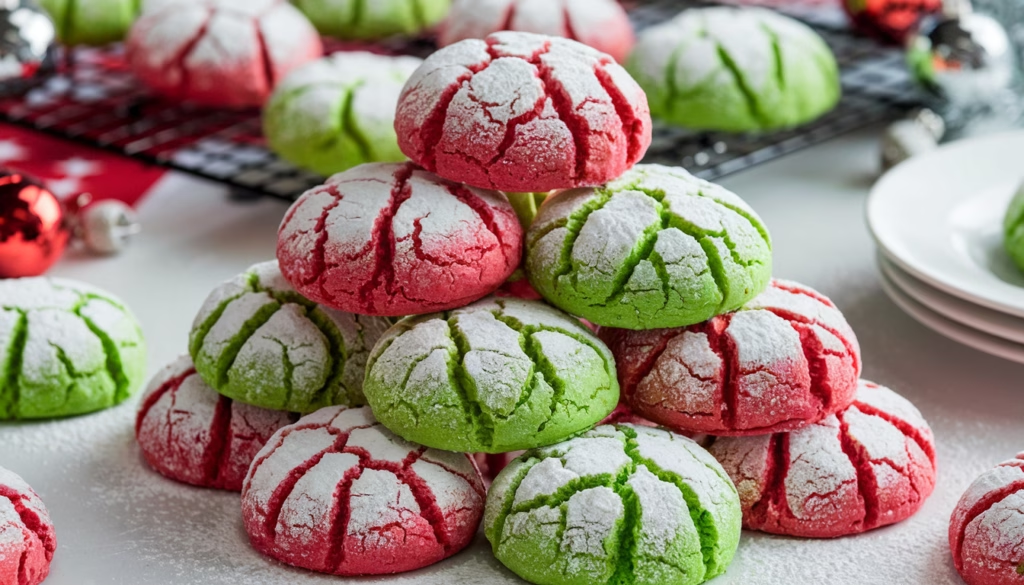
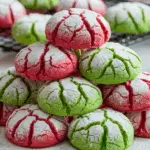
The holiday season is upon us, and what better way to celebrate than by baking a batch of festive cookies? These Festive Red and Green Crinkle Cookies!! are not only visually appealing with their vibrant colors and crackled powdered sugar tops but also incredibly easy to make. Using a simple white cake mix as the base, you can whip up these soft and chewy treats in no time. Whether you’re an experienced baker or a novice in the kitchen, this recipe is straightforward and yields delicious results that will impress your family and friends.
What you will need?
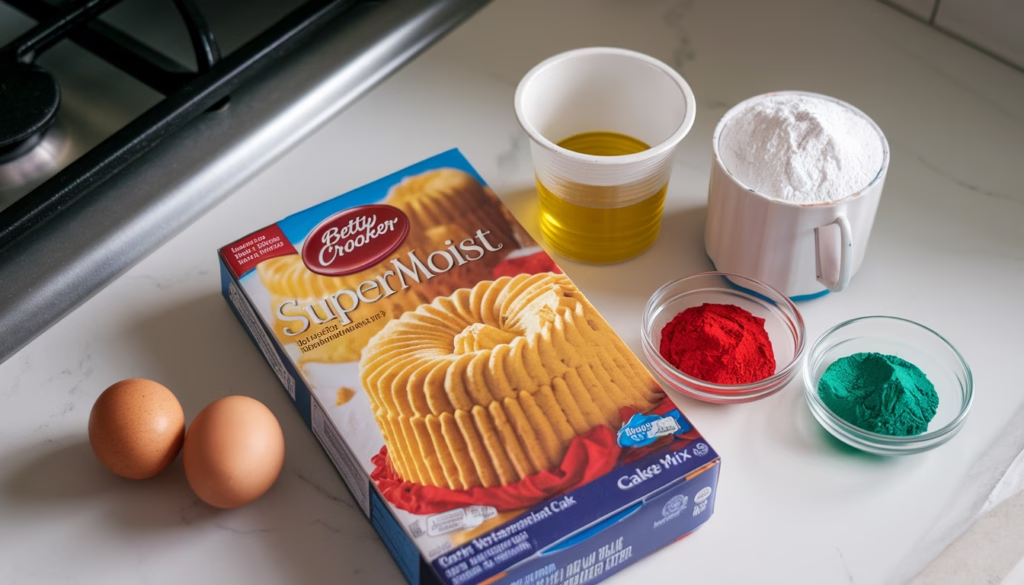
To get started, gather the following ingredients:
- White Cake Mix: One 13.25 oz box serves as the perfect base for our vibrant colors.
- Eggs: Two large eggs contribute to the cookies’ tender texture.
- Vegetable Oil: 1/3 cup keeps the cookies super soft.
- Powdered Sugar: 1/3 cup for that pretty, snow-like coating.
- Food Coloring: Red and green gel colors provide the brightest hues without altering the dough’s consistency.
Ingredient Alternatives:
- Cake Mix: You can substitute with vanilla or yellow cake mix; however, note that the final color may be affected.
- Eggs: For an egg-free version, replace each egg with a flaxseed mixture (1 tablespoon ground flaxseed mixed with 3 tablespoons water).
- Vegetable Oil: Olive oil or melted coconut oil can be used as alternatives, each imparting a subtle flavor change.
- Food Coloring: Natural food colorings, such as beet juice for red and spinach powder for green, can be used for a more natural approach.
Step-by-step Guiding
Follow these detailed steps to create your festive crinkle cookies:
- Prepare the Dough:
- In a large mixing bowl, combine the white cake mix, eggs, and vegetable oil.
- Stir until a smooth, thick dough forms, ensuring no lumps remain.
- Divide and Color:
- Split the dough into two equal portions, placing each in a separate bowl.
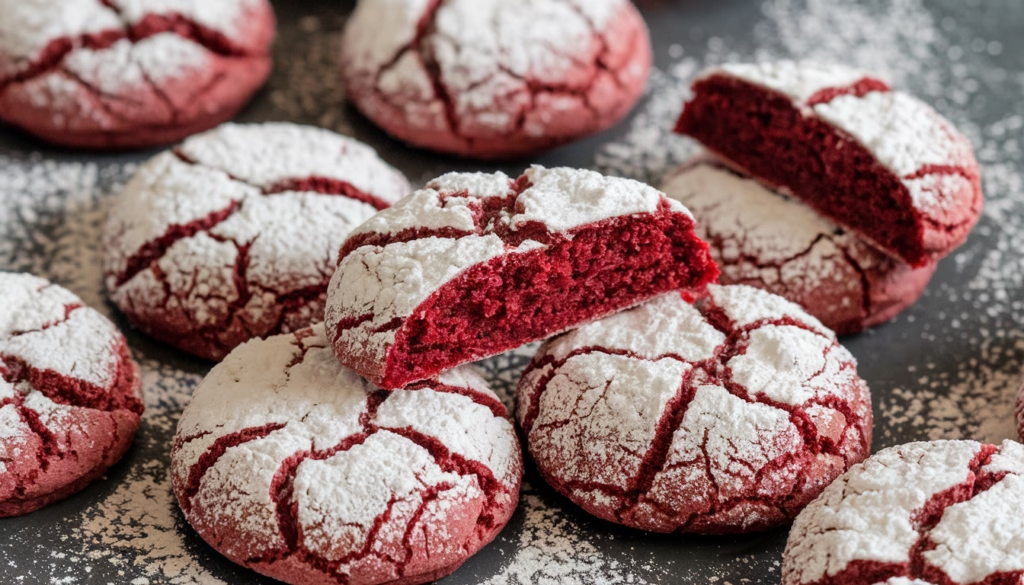
- Add red gel food coloring to one portion and green to the other.
- Mix each thoroughly until the color is evenly distributed, adjusting the amount of coloring to achieve the desired vibrancy.
- Chill the Dough:
- Cover both bowls with plastic wrap.
- Refrigerate for at least 30 minutes; this firms up the dough, making it easier to handle and enhancing the cookies’ texture.
- Preheat Oven:
- Preheat your oven to 375°F (190°C).
- Line a baking sheet with parchment paper or a silicone baking mat to prevent sticking.
- Form Cookies:
- Scoop tablespoon-sized portions of dough and roll them into balls between your palms.
- Generously coat each ball in powdered sugar, ensuring a thick, even layer for a pronounced crinkle effect.
- Bake:
- Place the coated dough balls onto the prepared baking sheet, spacing them about 2 inches apart to allow for spreading.
- Bake for 9-11 minutes, or until the cookies have spread, and the tops have a crackled appearance.
- Avoid overbaking to maintain a soft, chewy center.
- Cool and Serve:
- Allow the cookies to cool on the baking sheet for 2-3 minutes to set.
- Transfer them to a wire rack to cool completely.
- Once cooled, enjoy or store as directed below.
How to Make-Ahead, Storage, and Freezing
Make-Ahead:
- Prepare the dough as directed, including dividing and coloring.
- Wrap each portion tightly in plastic wrap and refrigerate for up to 48 hours.
- When ready to bake, proceed with forming, coating, and baking as instructed.
Storage:
- Store cooled cookies in an airtight container at room temperature for up to 5 days.
- To maintain softness, place a slice of bread in the container; the cookies will absorb moisture from the bread, keeping them fresh longer.
Freezing:
- Freezing Baked Cookies:
- Arrange cooled cookies in a single layer on a baking sheet and freeze until solid.
- Transfer to a freezer-safe airtight container or zip-top bag, placing parchment paper between layers to prevent sticking.
- Label with the date and freeze for up to 3 months.
- To thaw, place cookies at room temperature for about an hour; avoid refreezing after thawing.
- Freezing Cookie Dough:
- After dividing and coloring, scoop and roll the dough into balls.
- Place on a baking sheet and freeze until solid.
- Transfer to a freezer-safe container or bag, separating layers with parchment paper.
- Freeze for up to 3 months.
- When ready to bake, thaw dough balls in the refrigerator overnight, then roll in powdered sugar and bake as directed.
Common Mistakes and How to Fix Them
Crinkle cookies are a festive favorite, known for their distinctive crackled appearance and soft, chewy texture. However, achieving the perfect crinkle effect can be challenging. Here are common issues bakers face and how to address them:
1. Lack of Crinkle Effect
- Cause: Insufficient coating of powdered sugar or dough spreading too quickly.
- Solution: Ensure each dough ball is generously coated in powdered sugar. For enhanced crinkling, first roll the dough in granulated sugar, then in powdered sugar. The granulated sugar absorbs moisture, promoting better cracks.
2. Cookies Spreading Too Much
- Cause: Warm dough leads to excessive spreading, resulting in flat cookies.
- Solution: Chill the dough for at least 30 minutes before baking. This firms up the fat in the dough, controlling spread during baking.
3. Uneven or Minimal Cracks
- Cause: Expired leavening agents like baking powder or baking soda.
- Solution: Check the freshness of your leavening agents. Fresh leaveners ensure the cookies puff up correctly, creating the desired cracks.
4. Powdered Sugar Dissolves During Baking
- Cause: High humidity or insufficient coating can cause the sugar to dissolve, diminishing the crinkle appearance.
- Solution: Apply a thick layer of powdered sugar. In humid conditions, consider adding a small amount of cornstarch to the powdered sugar to absorb moisture and maintain the coating.
5. Dry or Hard Cookies
- Cause: Overbaking can lead to dry, hard cookies.
- Solution: Bake the cookies just until the edges are set, and the centers are still slightly soft. Cookies continue to cook on the baking sheet after removal from the oven, so it’s better to underbake slightly for a chewy texture.
6. Storing and Freezing Crinkle Cookies
- Storage: Keep baked cookies in an airtight container at room temperature for up to a week. To maintain softness, place a slice of bread in the container; the cookies will absorb moisture from the bread.
- Freezing Dough: Freeze uncoated dough balls on a baking sheet until solid, then transfer to a freezer-safe bag for up to three months. When ready to bake, thaw in the refrigerator overnight, roll in sugars, and bake as directed.
- Freezing Baked Cookies: Arrange cooled cookies in a single layer on a baking sheet, freeze until solid, then store in an airtight container with parchment paper between layers. They can be frozen for up to three months. Thaw at room temperature before serving.
Tips for Perfect Crinkle Cookies
To ensure your Festive Crinkle Cookies turn out perfectly, consider the following tips:
- Chilling the Dough: Don’t skip the chilling step. It makes the dough easier to handle and helps the cookies maintain their shape during baking.
- Even Coloring: Use gel-based food coloring for more vibrant colors without altering the dough’s consistency. Mix thoroughly to ensure even color distribution.
- Coating in Powdered Sugar: Ensure each dough ball is generously coated in powdered sugar. This creates the distinctive crinkle appearance as the cookies bake.
- Avoid Overbaking: Keep a close eye on the cookies during baking. They should be set but still soft in the center when you remove them from the oven to ensure a chewy texture.
Variations and Additions
While the classic red and green crinkle cookies are a holiday favorite, you can customize this recipe to suit your preferences:
- Flavor Extracts: Add a teaspoon of peppermint extract to the dough for a minty twist, perfect for the holiday season.
- Different Colors: Experiment with other food coloring to match different occasions or themes.
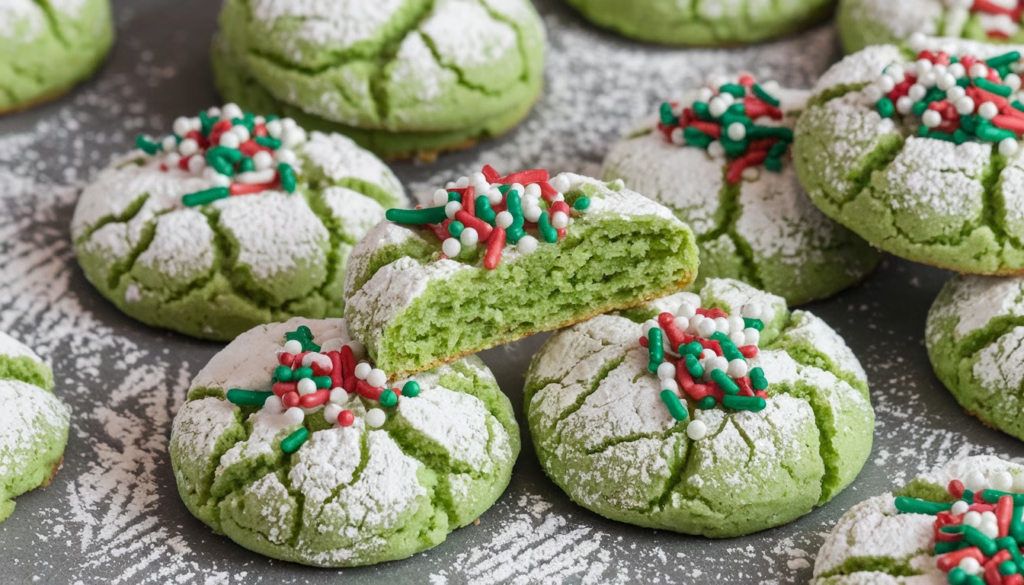
- Sprinkles: Gently press festive sprinkles onto the tops of the cookies before baking for an extra touch of holiday cheer.
Baking these Festive Red and Green Crinkle Delights!! is a delightful way to embrace the holiday spirit. With their vibrant colors, soft and chewy texture, and classic crinkle appearance, they’re sure to become a favorite at your festive gatherings. Plus, the straightforward recipe makes them accessible for bakers of all skill levels. So, gather your ingredients, preheat that oven, and let the holiday baking begin! Happy holidays and happy baking!
FAQs
Can I use a different flavor of cake mix?
Absolutely! While white cake mix allows the colors to stand out, you can experiment with other flavors like chocolate or vanilla. Keep in mind that the color of the cake mix may affect the final hue of the cookies.
How should I store these cookies?
Store the cooled cookies in an airtight container at room temperature for up to a week. To keep them soft, place a slice of bread in the container; the cookies will absorb moisture from the bread, staying fresh longer.
Can I freeze the cookies dough for later use?
Yes, you can freeze the dough. After dividing and coloring the dough, wrap each portion tightly in plastic wrap and place in a freezer-safe bag. Freeze for up to a month. When ready to bake, thaw the dough in the refrigerator overnight, then proceed with rolling in powdered sugar and baking.
🎄🍪Festive Red and Green Crinkle Cookies Recipe!!❤️💚
- Total Time: 25 minutes
- Yield: 6
Description
These Festive Red and Green Crinkle Cookies!! are not only visually appealing with their vibrant colors and crackled powdered sugar tops but also incredibly easy to make.
Ingredients
- 1 box white cake mix
- 2 large eggs
- 1/3 cup vegetable oil
- Red and green food coloring
- 1/3 cup powdered sugar
Instructions
- Prepare the Dough: In a large bowl, combine the white cake mix, eggs, and vegetable oil until a smooth dough forms.
- Divide and Color: Split the dough into two equal portions. Add red food coloring to one portion and green to the other, mixing each until the color is evenly distributed.
- Chill the Dough: Cover both bowls with plastic wrap and refrigerate for at least 30 minutes to make the dough easier to handle and to achieve fluffier cookies.
- Preheat Oven: Preheat your oven to 375°F (190°C). Line a baking sheet with parchment paper or a silicone baking mat.
- Form Cookies: Roll tablespoon-sized portions of dough into balls, then coat each ball thoroughly in powdered sugar.
- Bake: Place the coated dough balls onto the prepared baking sheet, spacing them about 2 inches apart. Bake for 9-11 minutes, or until the cookies have spread and the tops have a crackled appearance.
- Cool and Serve: Allow the cookies to cool on the baking sheet for a few minutes before transferring them to a wire rack to cool completely. Enjoy!
- Prep Time: 15 minutes
- Cook Time: 10 minutes
- Category: Cookies
Nutrition
- Serving Size: 4 cookies
- Calories: 90 per cookie