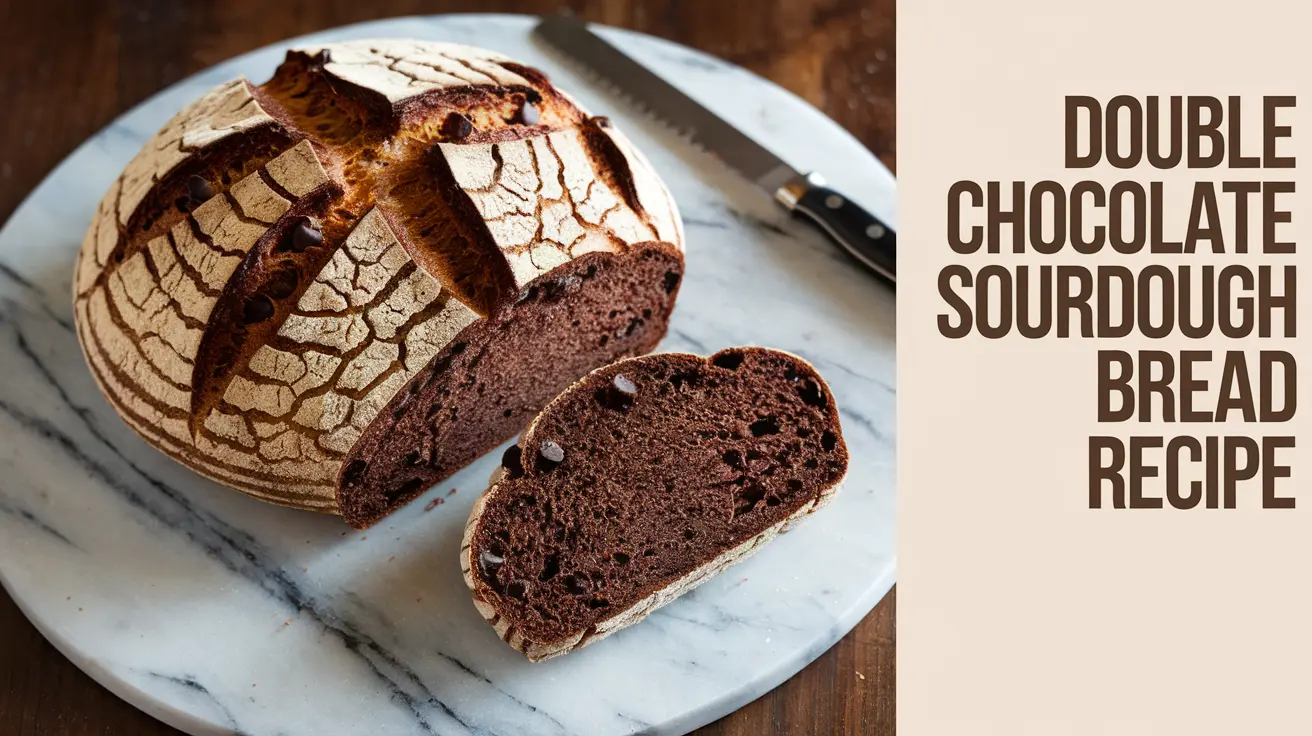
There’s something truly magical about baking bread at home—the aroma that fills the kitchen, the satisfaction of slicing into a freshly baked loaf, and, of course, the unparalleled taste. But what if we told you that you could elevate your bread-baking game by combining the tangy flavor of sourdough with the rich decadence of chocolate? Enter the Double Chocolate Sourdough Bread, a delightful fusion that’s sure to become a favorite in your baking repertoire.
In this article, we’ll walk you through the process of creating this indulgent loaf, from preparing your sourdough starter to the final bake. Along the way, we’ll share tips, answer common questions, and provide insights to ensure your baking experience is as smooth as possible. So, let’s dive in and get started!
Ingredients and Equipment
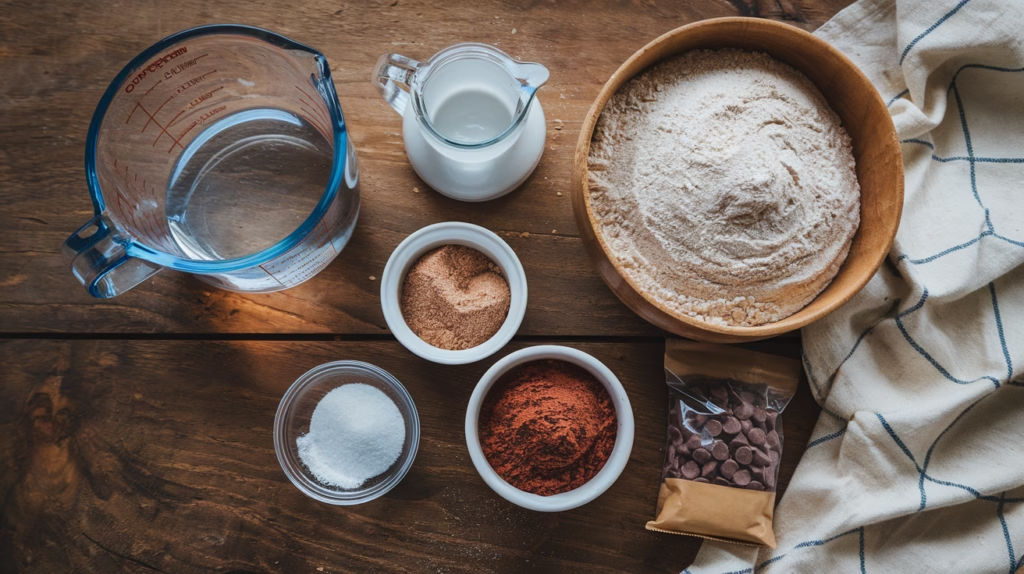
Before we embark on this baking journey, let’s gather all the necessary ingredients and equipment. Here’s what you’ll need:
Ingredients
1. 350g Warm Water 💧
- Purpose: Hydrates the flour, activating gluten development and facilitating fermentation.
- Tip: Maintain water temperature between 80-90°F (27-32°C) to optimize yeast activity. Using filtered or spring water can prevent chlorine from inhibiting fermentation.
- Alternative: For added flavor, consider using brewed coffee or a mixture of water and milk.
2. 475g Bread Flour 🍞
- Purpose: Provides structure and gluten necessary for the bread’s elasticity and chewiness.
- Tip: Opt for high-protein bread flour (12-14% protein) to achieve better gluten development, resulting in a superior crumb structure.
- Alternative: A blend of all-purpose flour and whole wheat flour can be used for a denser, more flavorful loaf.
3. 50g Brown Sugar 🍯
- Purpose: Adds sweetness and enhances moisture, contributing to the bread’s tenderness.
- Tip: Ensure the brown sugar is free of lumps to allow for even mixing and consistent sweetness throughout the dough.
- Alternative: Substitute with coconut sugar or honey for a different flavor profile.
4. 50g Cocoa Powder 🍫
- Purpose: Imparts rich chocolate flavor and color to the bread.
- Tip: Use high-quality Dutch-processed cocoa powder for a deeper chocolate taste and darker color.
- Alternative: Natural cocoa powder can be used but may result in a lighter color and slightly tangier flavor.
5. 100g Active Sourdough Starter 🍶
- Purpose: Leavens the bread and contributes to its characteristic tangy flavor.
- Tip: Feed your starter 4-12 hours before baking to ensure it’s active and bubbly. A well-fed starter should double in size and pass the float test (a small amount should float in water) to confirm its readiness.
- Alternative: If a sourdough starter is unavailable, a poolish or biga (pre-ferment) made with commercial yeast can be used, though the flavor will differ.
6. 10g Salt 🧂
- Purpose: Enhances flavor and strengthens gluten structure, contributing to the bread’s texture.
- Tip: Use fine sea salt for even distribution. Add salt after the autolyse (initial rest period) to allow enzymes to work on the flour without interference, improving dough extensibility.
- Alternative: Kosher salt can be used; adjust the quantity to account for its coarser grain.
7. 1 Cup Chocolate Chips 🍫
- Purpose: Provides pockets of melted chocolate, enhancing the bread’s indulgence.
- Tip: Toss chocolate chips in a small amount of flour before incorporating to prevent them from sinking during baking. Fold them into the dough during the final mixing stages to ensure even distribution.
- Alternative: Chopped dark chocolate or chocolate chunks can be used for varied texture and flavor intensity.
Equipmbent
- Large mixing bowl
- Measuring scale
- Wooden spoon or dough whisk
- Bench scraper
- Proofing basket or bowl lined with a floured cloth
- Dutch oven with lid
- Parchment paper
- Sharp blade or lame for scoring
- Wire rack for cooling
Step-by-Step Baking Guide
Now that we have everything ready, let’s dive into the baking process. Follow these steps closely to achieve the perfect double chocolate sourdough bread.
1. Prepare Your Sourdough Starter
Before you begin mixing your dough, ensure your sourdough starter is active and bubbly. Feed it with equal parts of flour and water and let it sit at room temperature for 4-6 hours until it becomes frothy and doubles in size. This active starter will provide the necessary leavening and flavor for your bread.
2. Mix the Wet Ingredients
In a large mixing bowl, combine:
- 350g warm water
- 100g active sourdough starter
- 50g brown sugar
Stir the mixture until the starter and sugar are fully dissolved, creating a uniform liquid base for your dough.
3. Incorporate the Dry Ingredients
To the wet mixture, add:
- 475g bread flour
- 50g cocoa powder
- 10g salt
Mix until a shaggy dough forms. It might look a bit rough, but that’s perfectly fine at this stage. Ensure all the flour is hydrated, and there are no dry patches.
4. Autolyse: Let the Dough Rest
Cover the bowl with a damp cloth or plastic wrap and let the dough rest for 30 minutes. This rest period, known as autolyse, allows the flour to fully absorb the water, aiding in gluten development and making the dough easier to handle.
5. Perform Stretch and Fold Techniques
Over the next 1.5 hours, you’ll perform a series of stretch and folds to develop the dough’s strength:
- Gently stretch one side of the dough upward and fold it over the center.
- Rotate the bowl 90 degrees and repeat on the next side.
- Continue until all four sides have been stretched and folded.
- Cover the bowl and let the dough rest for 30 minutes.
Repeat this process two more times, totaling three rounds of stretch and folds. This technique helps build the dough’s structure without the need for intensive kneading.
6. Incorporate the Chocolate Chips
During the final stretch and fold, gently fold in 1 cup of chocolate chips. Ensure they’re evenly distributed throughout the dough, providing pockets of melted chocolate in every bite.
7. Bulk Fermentation: The First Rise
Cover the bowl and let the dough rise at room temperature for 4-6 hours, or until it has doubled in size. The fermentation time can vary based on the ambient temperature and the activity of your starter. Patience is key here; allowing the dough to ferment properly develops flavor and texture.
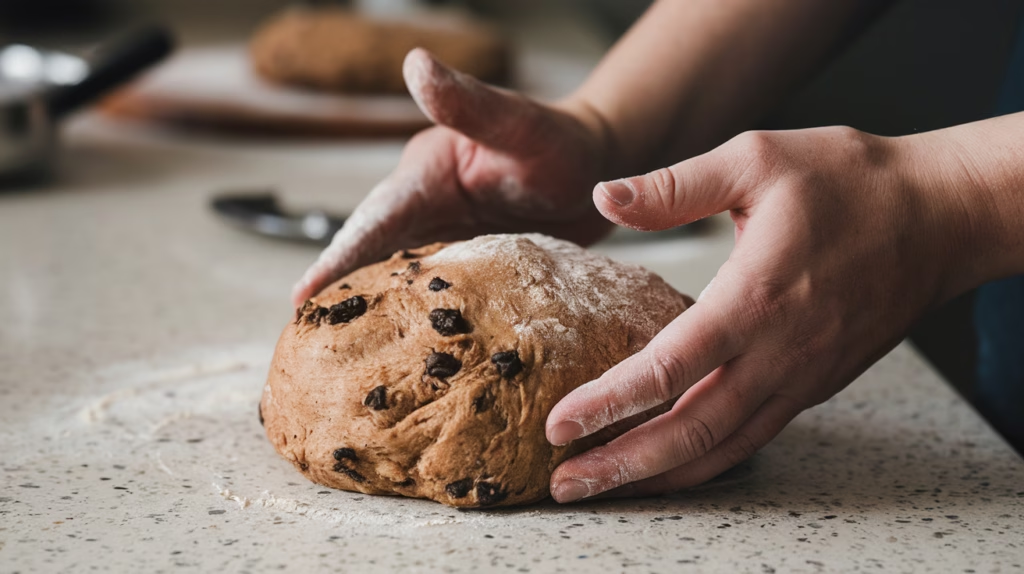
8. Shape the Loaf
Transfer the dough onto a lightly floured surface. Shape it into a tight round loaf by:
- Folding the edges into the center.
- Flipping it seam-side down.
- Gently rounding it with your hands to create surface tension.
Proper shaping ensures an even rise and a beautiful loaf.
9. Proofing: The Second Rise
Place the shaped dough into a proofing basket or a bowl lined with a floured cloth. Cover it and refrigerate overnight, or for at least 8 hours. This cold fermentation, known as retarding, enhances the bread’s flavor and makes scoring easier.
10. Preheat the Oven
About 30 minutes before baking, preheat your oven to 475°F (246°C) with a Dutch oven inside. Preheating the Dutch oven ensures a burst of steam when the dough is placed inside, leading to a crisp crust.
11. Score and Bake
Carefully turn the dough onto a piece of parchment paper. Using a sharp blade or lame, score the top of the loaf with a design of your choice. This allows the bread to expand properly during baking.
Transfer the dough (on the parchment) into the preheated Dutch oven, cover with the lid, and bake:
- 20 minutes with the lid on.
- Remove the lid and continue baking for an additional 20-25 minutes, or until the crust is deep brown.
12. Cool Before Slicing
Carefully remove the bread from the oven and let it cool on a wire rack for at least 1 hour before slicing. This cooling period allows the crumb to set and enhances the overall texture.
Storage Recommendations
- Once fully cooled, store the bread in an airtight container at room temperature for up to 3 days.
- For extended storage, wrap the loaf tightly in plastic wrap and freeze for up to 3 months.
- To refresh, thaw at room temperature and reheat in a 350°F (175°C) oven for 10 minutes.
Serving Suggestions
Enhance your Double Chocolate Sourdough experience with these delectable pairings:
- Nut Butters: Almond or hazelnut spread complements the chocolate notes.
- Cream Cheese: Plain or flavored varieties add a tangy contrast.
- Fresh Berries: Strawberries or raspberries provide a refreshing balance.
- Whipped Cream: For an indulgent dessert-like treat.
Tips for Success
- Monitor Dough Consistency: If the dough feels too dry or too wet, adjust by adding a small amount of water or flour. The dough should be slightly sticky but manageable.
- Active Starter: Ensure your sourdough starter is active and bubbly before using it. This is crucial for a good rise.
- Room Temperature: Keep the dough at a consistent room temperature during fermentation for optimal results.
- Ambient Temperature Matters: Warmer environments will speed up fermentation, while cooler ones will slow it down. Adjust your timing accordingly.
- Use Quality Ingredients: High-quality cocoa powder and chocolate chips will significantly impact the flavor of your bread.
FAQs
Can I use all-purpose flour instead of bread flour?
While bread flour provides better structure due to its higher protein content, you can use all-purpose flour in a pinch. The texture might be slightly different, but it should still turn out delicious.
How do I know if my sourdough starter is active?
An active starter should be bubbly and double in size within 4-6 hours after feeding. You can also perform a float test: drop a small amount of starter into water; if it floats, it’s ready to use.
Can I add nuts or dried fruits to Sourdough Bread?
Absolutely! Feel free to add chopped nuts or dried fruits during the stretch and fold process for added texture and flavor.
🍞🍫Homemade Double Chocolate Sourdough Bread Recipe🍞🍯
- Total Time: Approximately 20 hours (including fermentation and proofing)
- Yield: 1
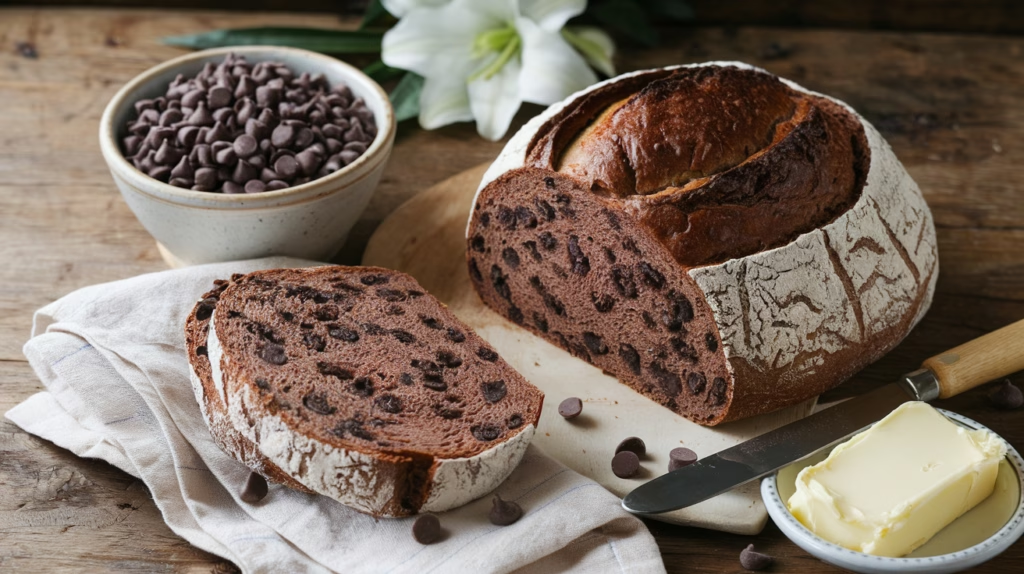
Description
Indulge in the rich fusion of traditional sourdough and luscious chocolate with our comprehensive guide to baking Double Chocolate Sourdough Bread. This artisanal loaf combines the tangy depth of fermented dough with the sweetness of cocoa and chocolate chips, resulting in a treat that satisfies both bread enthusiasts and chocolate lovers alike.
Ingredients
- 350g warm water 💧
- 475g bread flour 🍞
- 50g brown sugar 🍯
- 50g cocoa powder 🍫
- 100g active sourdough starter 🍶
- 10g salt 🧂
- 1 cup chocolate chips 🍫
Instructions
- Prepare Starter: Feed your sourdough starter and let it become active and bubbly. This usually takes 4-6 hours.
- Mix Wet Ingredients: In a large bowl, combine 350g warm water, 100g active sourdough starter, and 50g brown sugar. Stir until well mixed.
- Add Dry Ingredients: To the wet mixture, add 475g bread flour, 50g cocoa powder, and 10g salt. Mix until a shaggy dough forms.
- Autolyse: Cover the bowl and let the dough rest for 30 minutes to allow the flour to hydrate.
- Stretch and Fold: Perform a series of stretch and folds: Gently stretch one side of the dough upward and fold it over the center. Rotate the bowl and repeat on all sides.Cover and rest for 30 minutes. Repeat this process 2 more times.
- Incorporate Chocolate Chips: During the final stretch and fold, gently fold in 1 cup of chocolate chips until evenly distributed.
- Bulk Fermentation: Cover the bowl and let the dough rise at room temperature for 4-6 hours, or until it has doubled in size.
- Shape the Loaf: Transfer the dough onto a lightly floured surface. Shape it into a tight round loaf by folding the edges into the center and then flipping it seam-side down, gently rounding it with your hands.
- Proofing: Place the shaped dough into a proofing basket or bowl lined with a floured cloth. Cover and refrigerate overnight, or for at least 8 hours.
- Preheat Oven: About 30 minutes before baking, preheat your oven to 475°F (246°C) with a Dutch oven inside.
- Score and Bake: Carefully turn the dough onto a piece of parchment paper. Using a sharp blade or lame, score the top of the loaf. Transfer the dough (on the parchment) into the preheated Dutch oven, cover with the lid, and bake for 20 minutes. Remove the lid and continue baking for an additional 20-25 minutes, or until the crust is deep brown.
- Cool: Carefully remove the bread from the oven and let it cool on a wire rack for at least 1 hour before slicing.
- Prep Time: 30 minutes
- Cook Time: 45 minutes
Nutrition
- Serving Size: 1 slice (approximately 1/12 of the loaf)
- Calories: 200 kcal
- Sugar: 5-8 grams
- Sodium: 200-300 mg
- Fat: 3-5 grams
- Saturated Fat: 2-3 grams
- Unsaturated Fat: 1-2 grams
- Trans Fat: 0 grams
- Carbohydrates: 25-30 grams
- Fiber: 2-4 grams
- Protein: 4-6 grams
- Cholesterol: 0-10 mg